Everything fine about installing, now you can access to Jeteina. ‘http://localhost:8000/jetelina/’ is the default URL. Then, you can define your default database and register your initial users in the initialize process.
You can try again if you would get something unexpected fails during this initialize process, but you may have to start from the defrosting Jetelina if it would be unrecovered it.
1. Log in with the initial account
Before ‘3’, no one could access to Jeteilna because there is not any users yet. The users are registered in PostgreSQL or MySQL in ‘3’.
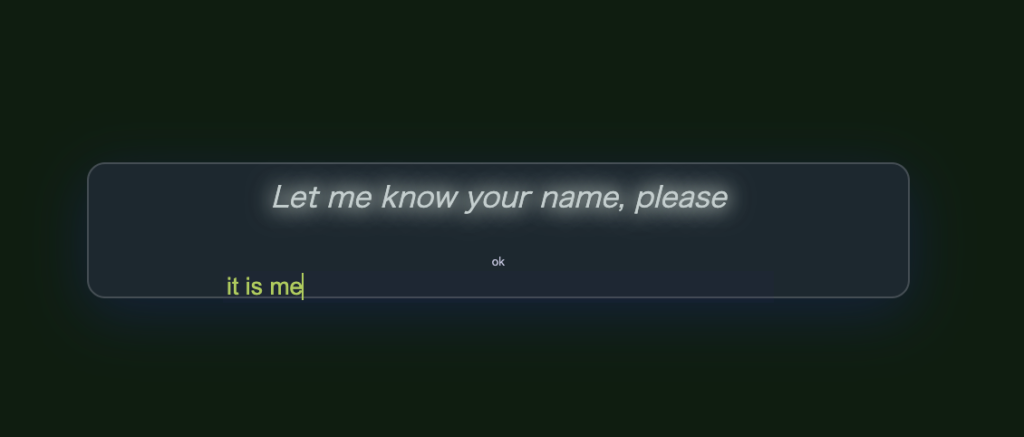
Let’s log in with ‘it is me’, which is the initial login account. You type this in Jeteilna’s chat box when it has asked you your name.
2. Select your primary RDBMS
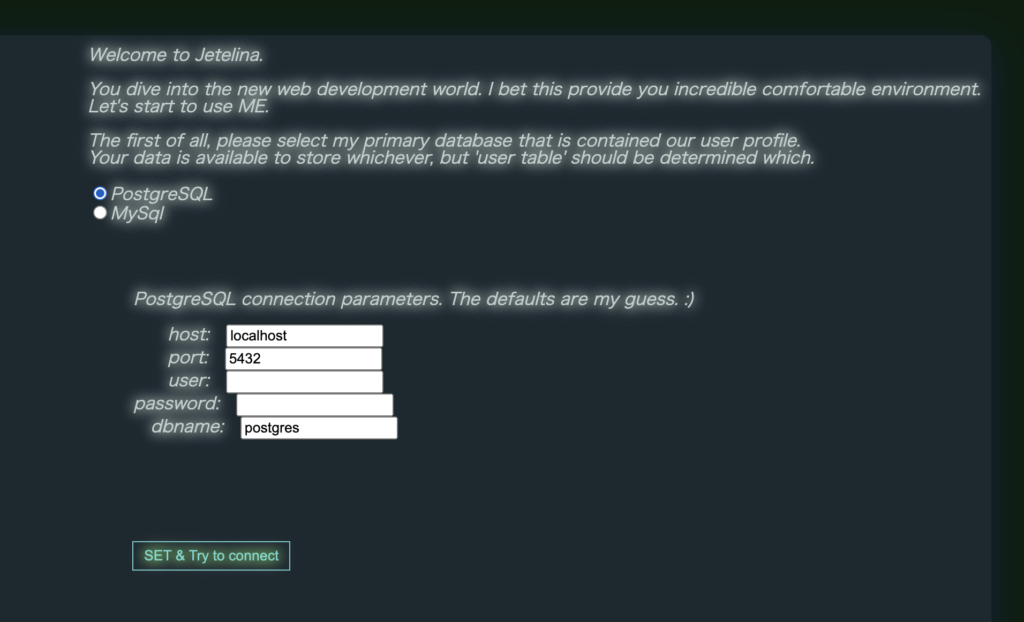
The first setting screen shows you the connection parameters for your selected database.
In the case of PostgreSQL. You can see the basic parameters in there and set your own parameters if you need to change them.
Note: The real database in ‘dbname’ must already exist in the database.
In the case of MySQL. Set your own parameters in there as well, but attention,
a) The real database in ‘dbname’ must already exist in the database.
b) The ‘unix_socket’ is sometimes different between Linux and Mac. You can ignore this parameter in case of windows.
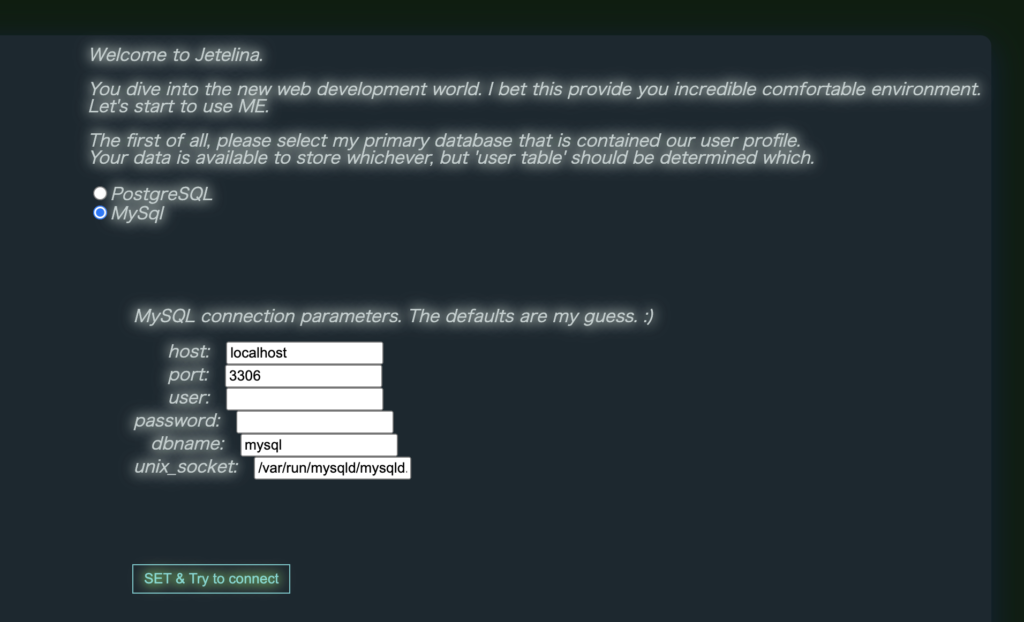
Set every parameter and click ‘SET & Try to connect’ button. Jetelina’s initialize process shows ‘2’ if Jetelina has succeeded to connect to there. However, if it failed, you may need to adjust some parameters to fit on your system environment, and try again.
If the errors confuse you and make you lose your way, try the below process.
i. Clean up your selected RDBMS
・PostgreSQL: drop tables in ‘postgres’ database
・MySQL: drop database ‘jetelina’ if it has been created
ii. Initialize Jetelina environment (just copy & overwrite) ~/Jetelina/app/resources/config/JetelinaConfig.cnf file from the download file.
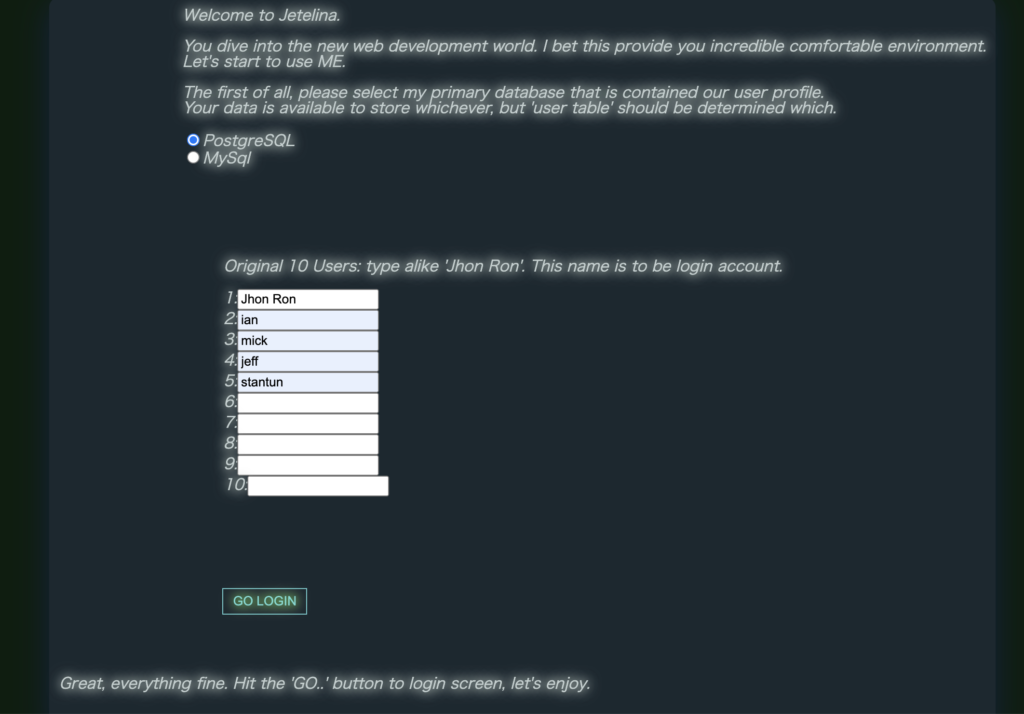
3. Register the generation ‘0’ users
The form of registering the first users is displayed after successfully connecting to your RDBMS. Fill your generation ‘0’ user’s name into it. You can regist maximun 10 generation ‘0’ members in this initial process.
Refer to the meaning of ‘generation’ here.
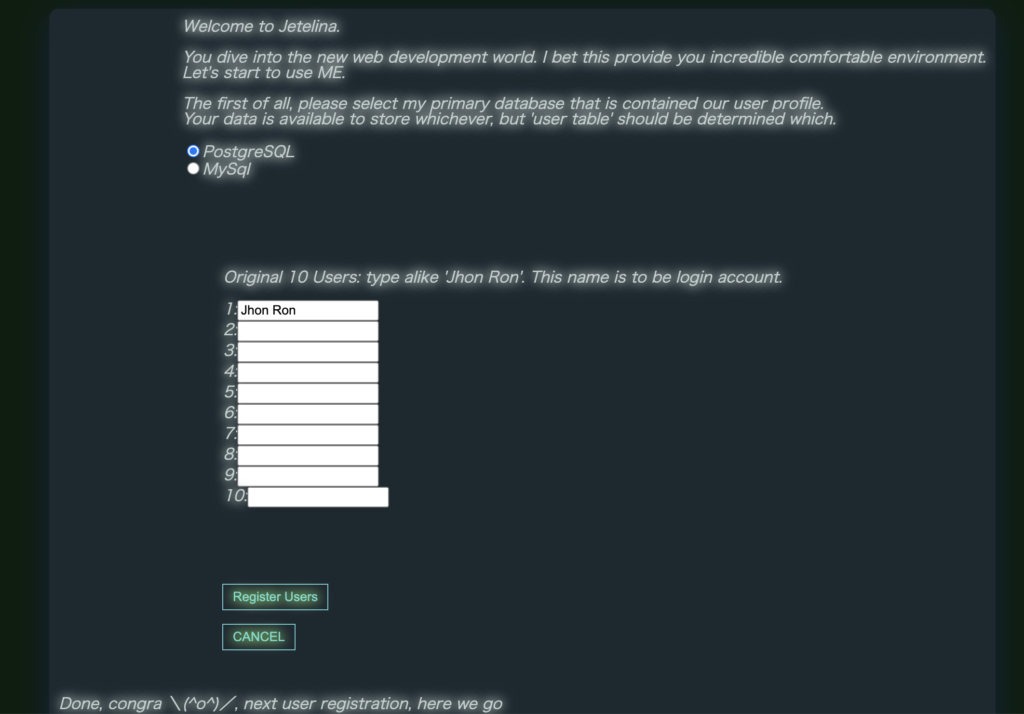
These filled users names are to be their login account on Jetelina. Then, click ‘Register Users’ button. ‘GO LOGIN’ button will be appeared if everything would work fine.
Then, click ‘GO LOGIN’ button to log in to Jetelina with the registered name.